Dragonfly Designs

'Stash Busting' sewing projects designed to use what you already have.

Tuesday, November 21, 2006

Album Cover


This project quick, easy, and a great way to consume small bits of your stash. In this case I've covered a three ring notebook and filled it with acid free, clear protector sheets to create an album for post cards. But dont stop there, cover an inexpensive journal to use as a gift or make covers for kids school books using novelty fabric of their favorite cartoon characters or sports teams or create a wedding/baby album. As with the other projects, any thing goes!

What you'll need:
  • Book, note book or journal to cover
  • Fabric, two colors
  • Basic sewing supplies

A three ring binder is a good item to use for your first cover because it opens completely flat and makes measuring easy. I wanted the spine to be a solid color, and the fabric to represent the contents of the album; in this case, post cards. Decide the width you want the spine color to be, and stitch it to two pieces of your coordinating fabric. Then trim final piece, leaving a 3/4" seam allowance top and bottom, and 5-6 inches on each side to form the 'pockets' for the cover.


Hem each end and press.

Place notebook on right side of fabric and pin hemmed sides over notebook to form pockets for the cover. Be careful to make the pockets the same size, and double check to make sure your coordinating color on the spine is centered on the spine.


Stitch up each side to secure pockets, turn cover right side out and press. (I used a serger for this step, if you do not have one you may want to leave yourself a full 1" seam allowance top and bottom, and put a narrow hem on those edges as the first step.) Press edges under and hem or glue in place.

Once dry, slip cover over your book and show it off!

Sunday, October 22, 2006

Portable Quilting Work Area

Wow, six months since my last post here; how the time does fly! My apologies for my absence, in the future I will shoot for a monthly project, minimum.

This project is not going to reduce your stash, in fact, I'm going to send you to the store. Worse, I'm going to send you to the home improvement store. But, it will help you reduce your stash the next time the quilting bug bites you. I've only completed three quilts, all just a little larger than crib size, but even at that diminutive size I found work space to be a big issue. The one I am working on now, affectionately dubbed "The Bruise", is considerably larger and because I am 'designing as I go' I need to be able to see it as I work. My solution was to clear a spot on the floor and 'tile' it with quilt blocks. The problem was that every time I turned to look at it there was a cat, or dog, or, umm... a MAN standing on it. What I needed was a big bulletin board, but wall space too was a premium.

What to do? Simple, create a 'foldable' work area, and especially 'storeable' work area (for when the project goes dormant, heh).

What you'll need:

(2) drapery brackets (as plain or as decorative as you like)

(1) rod (I used a composite closet rod - much cheaper than a true drapery rod, but not as rigid)

(1) sheet

basic hand tools

First determine how wide you want your new work space to be, and which wall you want it on. I opted to hang mine over my workroom's closet door. Which worked out quite well as the brackets are less noticeable against the door molding.

Then mount your brackets according to the package instructions, lay your rod across them, hang your sheet and voila!

Certainly the work area has some problems; it can be difficult to pin to as the fabric is mobile, it is almost impossible to pin the blocks perfectly square to each other, and, if you are short like me, you will need a step stool (which Daniel is keeping from floating away in the first photo). It could also be far more elaborate byusing a true drapery rod with finials, and pocketing the sheet for more stability. But, in a house with pets, and a MAN this is a much better way to protect a ‘wip’, with the added bonus of being able to fold the whole thing up and tuck it away when ‘company’s a commin’.

Saturday, April 01, 2006

Stash Buster ... Drawstring Bag

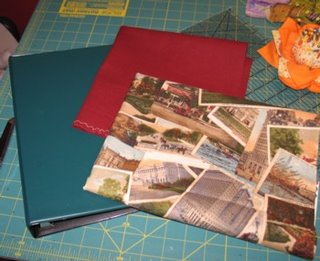
This tutorial is for a small bag perfect for gifting stitch markers, jewelry or to store your grandmother's favorite thimble, and the sky is the limit for size, embellishment and material. It's a great way to use up the little pieces fabric we all accumulate (too little to use and too big to throw away).

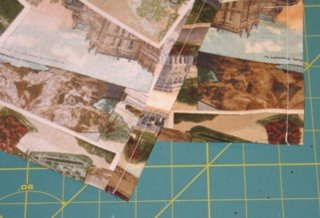
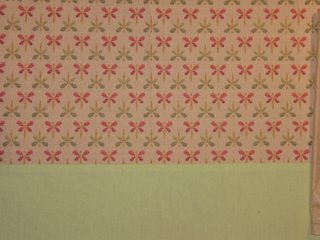
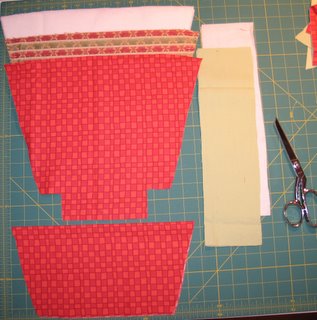
I started off with four pieces of fabric cut to 4"x5".


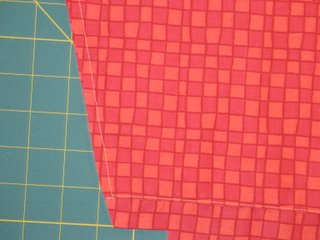
Place each pair right sides together and stitch around three sides, leaving one short side open. Trim the corners and excess fabric.


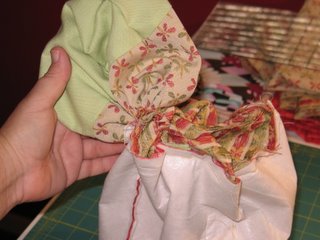
Turn one bag inside out and press it flat. Slip the turned bag into the unturned one, match side seams and raw edges and pin.

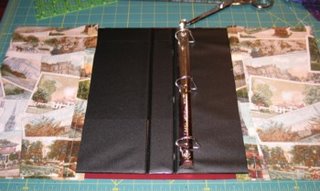
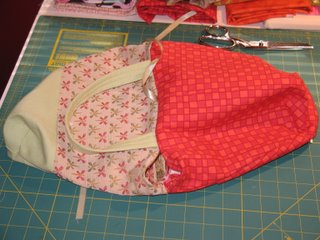
Starting in the center of one side stitch around the top and stop about 1 1/2 inches from where you started. Turn the whole thing inside out through that gap, which will give you something that looks like this.


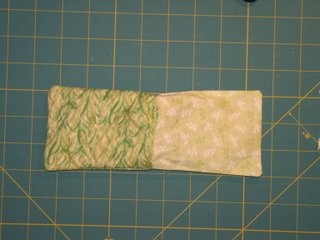
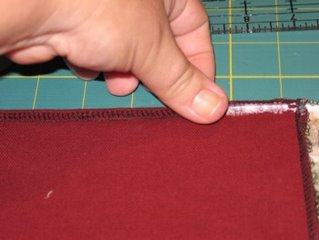
Fold the lining side into the outer side, and press flat. Slip stitch the gap closed.

If you are building a stash of these for gifting, this is a perfect place to stop. Applying the drawstrings and embellishments is a great 'anytime' project when you just want to do something creative.

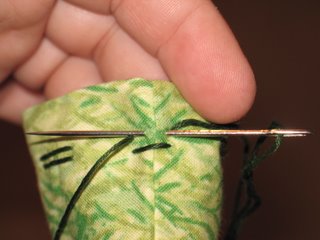
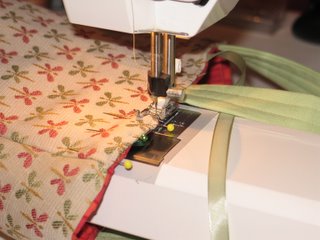
To finish, use a large needle threaded with your drawstring of choice, start at one side and stitch in 1/2" stitches around top of the bag (through both layers) until you are back to the beginning.


Repeat this process starting from the other side of the bag, so that you have two pairs of loose ends, one on each side of the bag. These will draw the bag closed.


Now you need a pair of pulls to open the bag. Re-thread you needle and take a short stitch under each side seam, this time going between the two layers - to hide the trick.


And, voila a bag! Now to embellish the ends of the ties. Beads are quick and easy, and will work well with embroidery thread or ribbon. Another way to finish off the ends is with a fabric flower. This works well with embroidery thread as a drawstring as the knotted ends become the stamen for the flower. Cut a 2"x4" strip of fabric, fold in half lengthwise and right sides together, and stitch down edge opposite fold. Turn the tube inside out (a turning tool helps tremendously), and then turn it again, but stop half way. Repeat. This will give you two tubes, raw edges at one end - I usually leave the 'wrong side' a little longer than the other, so I can see where to tie it off.


Slip the tube onto the loose ends of one pair of drawstrings, the raw edge should be closer to the ends of the drawstring and the folded edge toward the bag. Thread one of the drawstring ends onto your needle and stitch it through both layers of the tube (if your drawstring is too short, insert the needle through both layers and then thread). Slide the tube along this string to where you want it so stop. Take a small piece of embroidery thread and tie it around the raw ends of the tube firmly. Also tie the ends of the drawstring together, this will keep it from slipping off. Knot and trim the drawstring ends, and put a dot of Fray Check on all of the knots you just made and trim long ends from tie at base of flower.


Turn the finished edge toward the knotted drawstring ends, hiding the raw edges. The finished end will look like a bell shaped flower. Done! Experiment with fabrics, ties, beads, ribbon and cord. Above all have fun! And reduce that stash!

Monday, February 27, 2006

Interfacing Part II ... And Bag-a-palooza!


Sunday was Bag-a-palooza around here and I managed to churn out six bags in preparation of our yard sale next weekend. One of which is possibly my most favorite bag ever! I had very little to do with that bag being a new favorite because my choice has nothing to do with the pattern and everything to do with the fabric and the color. Did you guess the burgundy one? You'd be right.


Also this weekend I tried a new type of interfacing. It is made by Pellon (the same as my previous purchases), but it is very thick and very, very stiff (probably much like buckrum). So stiff in fact there is only one layer in that burgundy bag and yet it stands up very nicely! It is somewhat expensive (about $6 / yd) but you do use less. I will definitely need more practice in using it as proved to be a little tricky. Because it is so stiff you need extra room (about double) to 'turn' the bag. I found leaving an opening between handles (over the side seam) to be enough. Also, at the side seams I had to set my machine on the 'leather' setting and even then it was struggling to handle the extra thickness. I was using a denim needle at the time, but will try 'extra sharps' as well. If your machine has trouble with four layers of denim I'd avoid this style of interfacing. I also found that to do the final top stitch around the upper edge you need to pin the fold in the interfacing all the way around, rather than just the area left open for the 'turn' because the interfacing tries to 'stand up'. All in all its a toss up, greater expense / use less, and faster (cutting time)/ slower (sewing time). Final opinion - liked it, and loved the results!

Friday, February 24, 2006

Interfacing...

I had a very nice comment and question yesterday from Zonda, regarding interfacing and what type I use. For the most part I am limited to what's available ... sometimes I get fusible and sometimes not, but I always ask for the 'collar and cuff' interfacing. It is fairly stiff and maintains that firmness even after being washed. There is also a 'craft' interfacing that is very stiff that works well, but I still find that I need to use two or three layers. I prefer that my bags 'stand up' by themselves, because it makes them easier to 'dig around' in. Since I can't always tell how many layers I'll need to accomplish this I work with interfacing and the 'weakest' fabric first (weakest meaning the fabric with the softest hand) and two layers of interfacing. That way, if I need to add another layer I still have remaining parts to add it to. As a side note, remember that when you add interfacing layers you are adding double that amount at the seams. In other words two layers of interfacing will equal four layers at the side seam where you stitch across the seam allowance. That's why I decide how many layers I will use as I go, rather than just making a general rule. To many layers will make for a nice stiff bag, but can also create frustration in the form of jammed machines and broken needles.

At some point I plan to try buckrum, a very stiff millinary product, as the interfacing. Unfortunatly it is not readily available in this area and must be mail ordered. When I do, I'll be sure to let you all know how well it works.

Monday, February 13, 2006

Square bag...


What I like most about square bags, and square bottom bags, is how easily the same pattern can be changed to create an entirely different sized and shaped tote. The 'Knitting Tote" in the upper right is exactly the same pattern as the lower three bags with different dimension and handle treatment.

To construct a pattern for a square bag, first decide on your finished dimensions. Take 10"w x 8"h x 4"d for example. To make a pattern for these dimensions simply consider width and depth together, and height by itself. Because the bag is only two pieces of fabric (not including embellishment or contrasting colors) the width and depth will become one dimension - 10 + 4 = 14, add in your seam allowance (x 2)*, 1/2 x 2 =1" and your fabric must be cut 15" wide. Height is figured similarly, but with only 1/2 the depth. 8" + 2" = 10, add in 1" seam allowance and fabric will be 11 inches high. To make the bottom square you must notch the corners by removing a square equal to 1/2 the depth, plus the seam allowance (do not multiply seam allowance this time). Each notch will be 2 1/2 inches square. and your pattern will look like this.

Grayed area is the original 10x8 dimension, dashed line is seam allowance. Sewing instructions are identical to the Pool Bag 2 instructions. This basic bag is very simple, giving you ample opportunity to play with dimension, embellishment and closures.

*I use 1/2 inch because the math is easy ;-), but usually sew a 1/4 allowance and trim the excess.

Sunday, January 22, 2006

Pool Bag 2


This bag is my own pattern and is very similar to the previous bag. The primary exception being that the bottom of the bag is square, and much easier to produce than the oval bottom of the previous bag.

The previous bag started with cutting everything out, this time, we are making a two toned bag. I like to make super sure both sides match by sewing together my coordinating pieces first. I mark on my pattern how high I want the line to be and cut each piece of the outer fabric individually.

Then I cut the remaining pieces out. You should have the following:

  • 2 outer pieces
  • 2 lining pieces
  • 4 interfacing
  • 2 handles
  • 2 interfacing (matching handle)

Start with the pocket, fold it in half wrong side out (along the same fold you cut it along). Stitch the bottom of the pocket closed and turn it right side out and press. Stitch pocket to one side of lining, about a 1/4 inch above the corner cutouts. Baste pocket along sides, remembering to stay between seam allowance and edge so you don't have to pick out baste.


Place second lining piece of face down on piece with pocket and sandwich with two pieces of interfacing on each side. Stitch up both sides and across bottom. DO NOT stitch corner cut outs yet. Match bottom seam to side seam on corner cut out, and stitch (making a box of bottom). Repeat on other side. Repeat with exterior fabric.

Lay bag parts aside, and move on to handles. Stack one piece of handle with one piece of handle interfacing (interfacing to wrong side of handle). Fold in half and iron. Fold raw edges to center of each fold and iron again. You should have a 'v' shaped piece of fabric, raw edges toward center of 'v'. Stitch handles 1/4 inch from each edge, go slowly, the thickness will try to wander.


Once handles are complete pin them to exterior bag (which should be right side out), 3/5 inches from edge. Use two pins on each handle to prevent them from slipping when you sew. If you want to use a ribbon closure pin it to center.


Once pinned slip exterior bag (still right side) into lining (wrong side out), the two right sides of your fabric should be facing each other and handles will be between layers.

Starting at one side seam sew with 1/2' seam allowance around top of bag. At each handle, sew across, reverse and sew across again. You will pass over each handle three times. When you reach fourth handle end complete the three passes and backtack to lock thread. DO NOT sew entire way around bag, you need the opening to turn the bag inside out. Carefully pull exterior of bag through hole and continue till whole bag is inside out.


Push lining into bag being sure to push out bottom corners so that top edge turns out entirely. Fold in and pin edges of the opening that you turned the bag through and press well.

Top stitch a 1/4 seam around top edge of bag, make sure you catch the folded under pieces of the turn opening. Finish by adding beads, if desired, to ribbon ends and tying. If you choose to leave ribbons as is, treat ends with Fray Check to prevent raveling. Press again and enjoy your new bag.